Implementing Odoo’s kiosk mode attendance is key to improving personnel management in any company. This system enables precise tracking of clock-ins and clock-outs, optimizing time management and reducing errors. It also facilitates real-time monitoring and encourages punctuality, directly impacting team productivity. Want to know how this tool can transform your organization? Keep reading to discover its benefits!
What is Odoo Kiosk Mode Attendance?
Kiosk Mode Attendance in Odoo is a feature designed to facilitate employee attendance tracking using a shared device, such as a tablet or computer in a centralized location, typically at the facility entrance. In this mode, the device acts as a terminal where employees can clock in and out using various forms of identification, such as barcodes, QR codes, RFID cards, or biometric identifiers.
Read also: Odoo vs. Shopify, Magento and WooCommerce: Which is the Best Option?
How to use the assistance in Kiosk mode in Odoo
Members can simply record their attendance by searching for their name or using the scanner input. Odoo’s kiosk mode attendance allows an employee to clock in by applying their credentials, PIN, etc.
To use the Kiosk Application in Odoo we will follow the following steps:
Settings
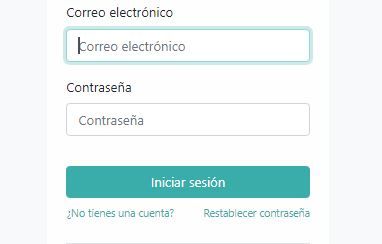
1st We need to log in with our credentials on our company’s website, here:
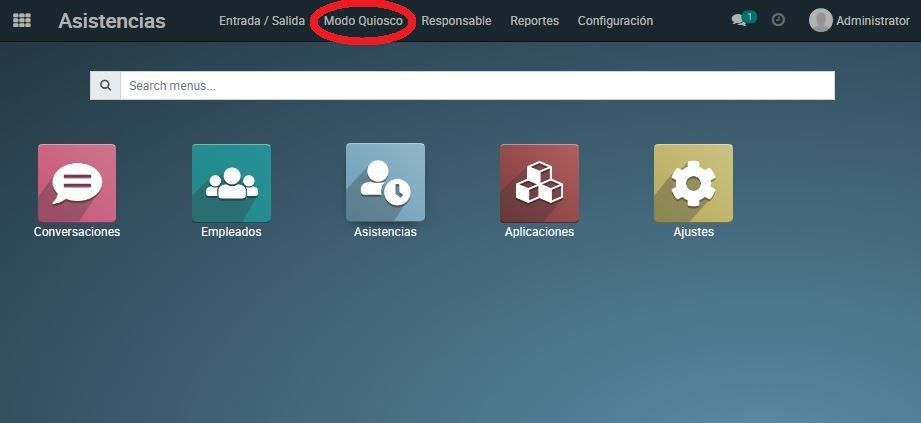
2º Once registered in our web page we will go to the main menu and click on the Kiosk Mode marked at the top left.
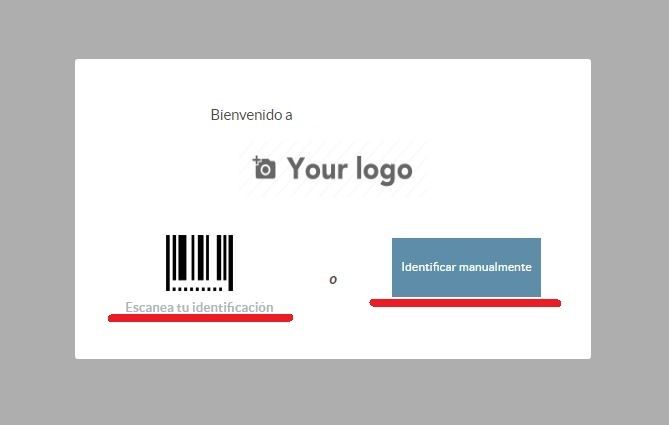
3º Once inside, click on “Identify manually” or “Scan your ID” to gain access.
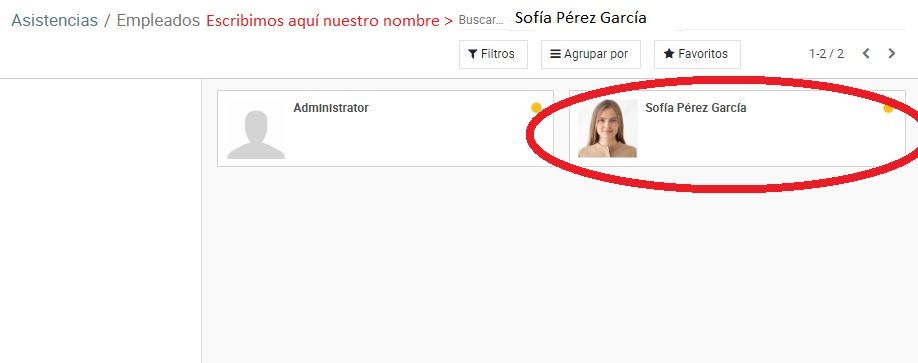
4º After identifying ourselves we will have to look for ourselves among the company's employees and click on our profile.
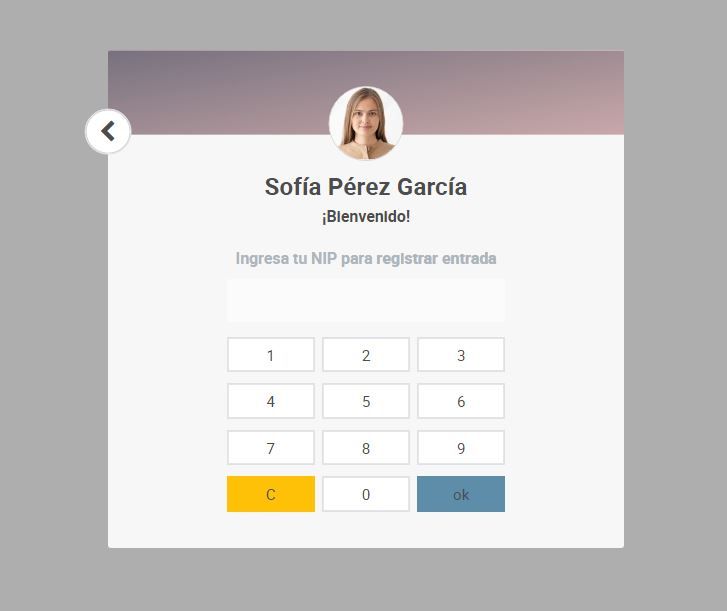
5º Once we click on our profile we will be sent to enter our own PIN code, type it and that's it, we are now registered.
Creating a new employee profile in Odoo’s Kiosk Mode
To create a new employee profile we will perform the following steps:
Settings
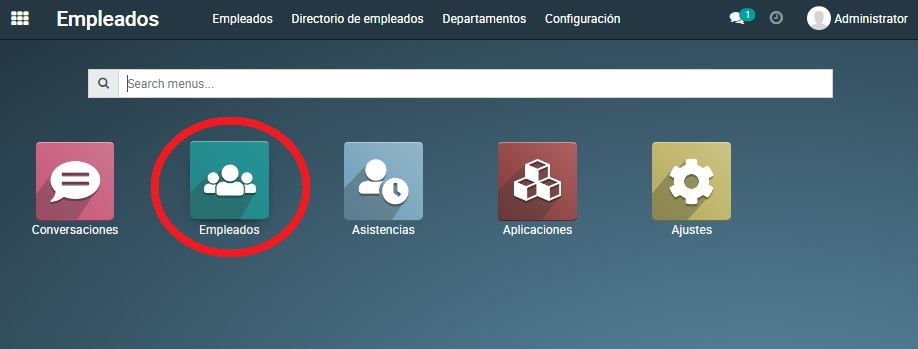
1st Enter the main menu, and once inside, click on the "Employees" option.
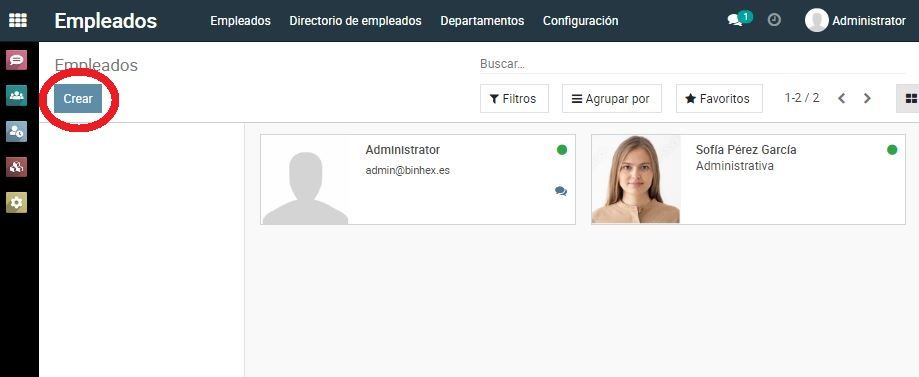
2nd Once inside, we will click on the "Create" option.
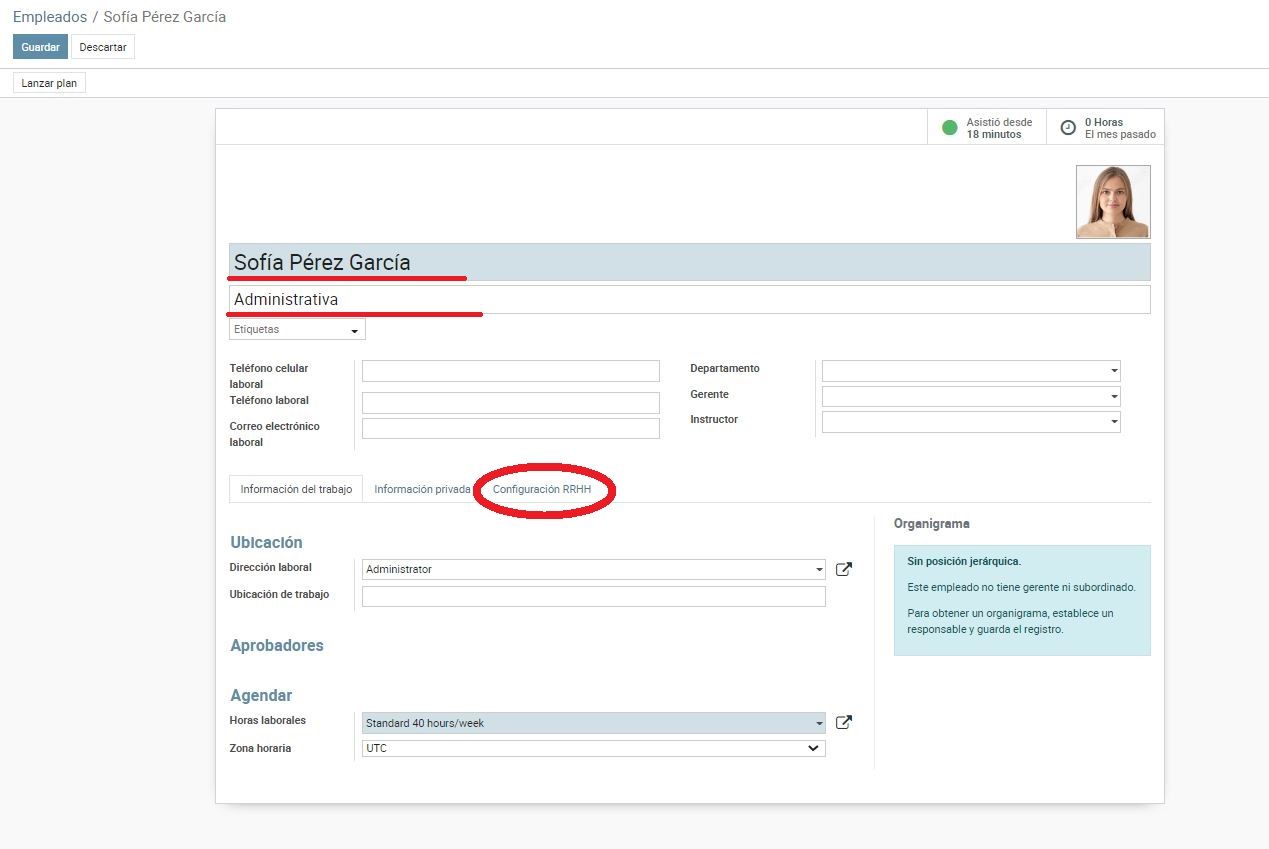
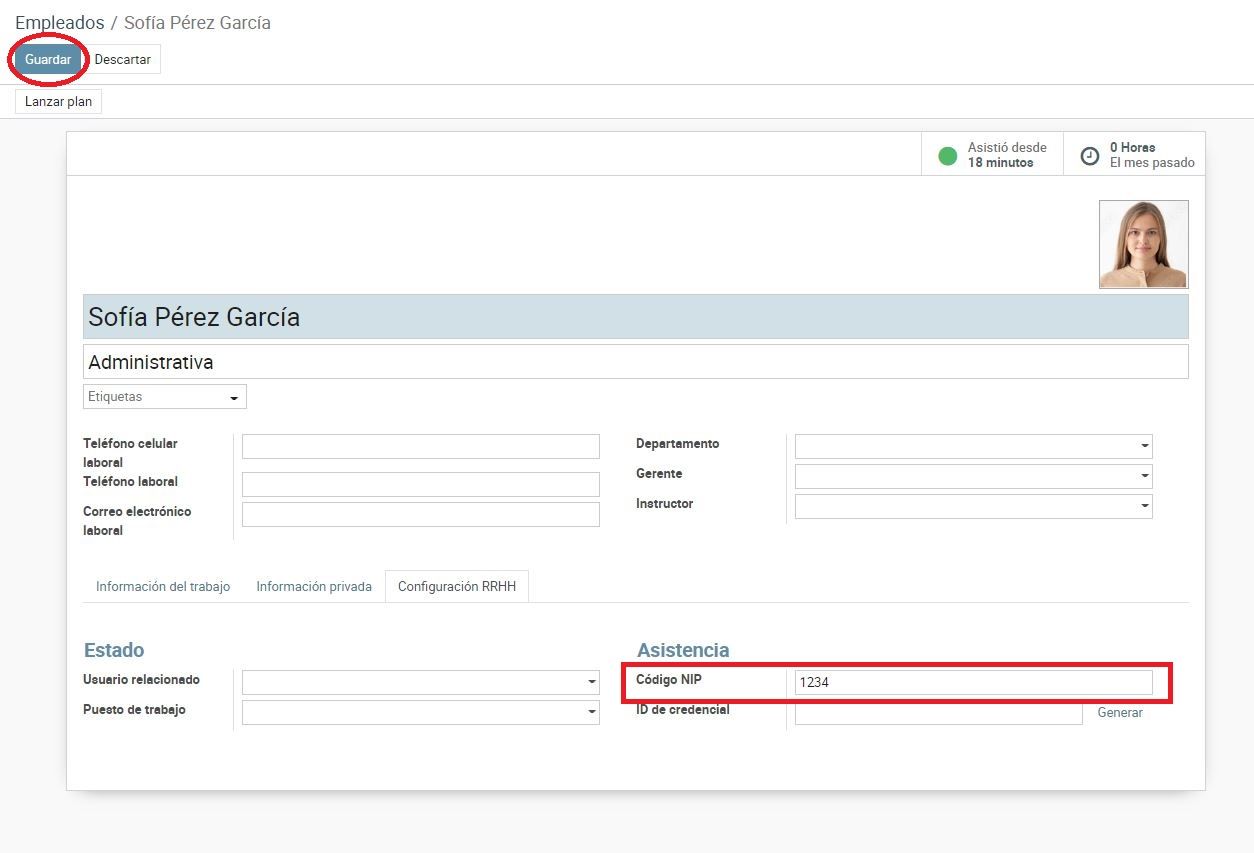
3º After clicking on the blue “Create” button, we will be sent to the employee creator, once there we will fill in the boxes with the new employee's information and then click on the HR Configuration (circled in red) for the creation of the new PIN that will be assigned to the employee.
You may also be interested in: Discover the Importance of BC3 Files in Odoo ERP by Binhex Cloud
4º Once inside the “HR Configuration” we will place the PIN that we want to assign to the new employee (In this case the PIN of 1234 has been used as an example) and finally we will click on SAVE and we will have our new employee created.
This brings us to the end of our information on "How to Use Odoo Kiosk Mode Attendance." We hope you found it useful. Remember that at Binhex Cloud we provide IT solutions for SMEs and businesses. Follow us on Social Media to stay updated with all the news about our services. Don't hesitate to contact us and we will assist you in the best way possible.
Start a FREE Odoo trial!
Join us in making the company a better place.
How to use the Kiosk mode support with Odoo