Protect Your Data with Backup Solutions in Binhex Cloud
Introduction
At Binhex Cloud, we understand that data protection is essential for any business. That’s why our solutions offer flexible and reliable options for backup management. From our automatic LXC container backups to the freedom of configuring your own backups with auto_backup, we provide everything you need to keep your data safe.
Backup Options in Binhex Cloud
Addon auto_backup
Available in all our solutions, the auto_backup addon allows you to configure and manage automatic backups of your databases. This tool is designed to provide you with complete freedom and flexibility in protecting your information.
Automatic Backups for LXC Containers
Included starting from the lightweight database solution, this service ensures your data is automatically backed up by Binhex Cloud. For small database solutions, the auto_backup addon is an excellent option for managing your own backups.
Benefits of auto_backup in Binhex Cloud
Simple Automation: Configure periodic backups effortlessly.
Complete Flexibility: Choose where to store your backups, whether on local servers or in the cloud.
Essential Complement: Ideal for clients with small database solutions who can use this tool to protect their data.
Open Source: A transparent solution supported by the OCA community.
auto_backup Configuration Guide
Step 1: Enable Developer Mode and Install the Addon
Access the administration panel by clicking on Settings.
- At the bottom of the menu, you will find the option "Activate Developer Mode."
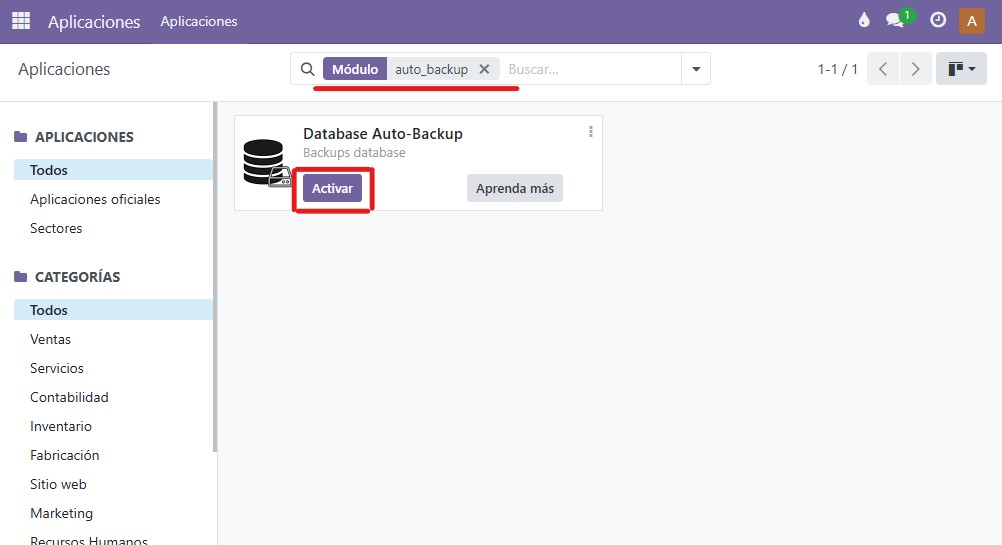
Once enabled, go to the Apps menu.
Search for auto_backup using the search bar.
Click the Activate button to install the addon.
Screenshot:
Step 2: Initial Backup Configuration
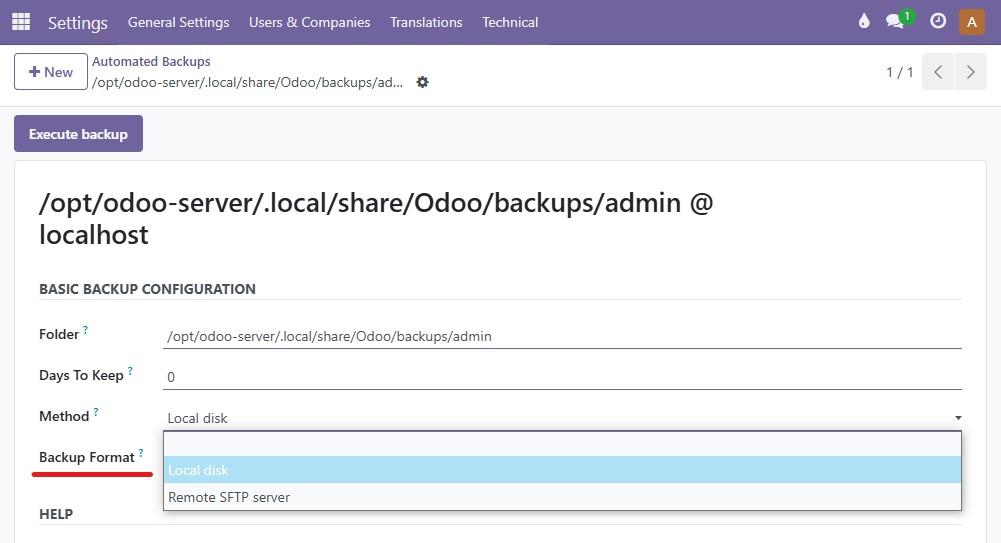
Go to Settings → Technical → Database Structure → Automated Backups.
- Specify the storage destination (local server, FTP, or SFTP).
- Create a new configuration for each database you need to back up.
Screenshot:
Step 3: Frequency Configuration
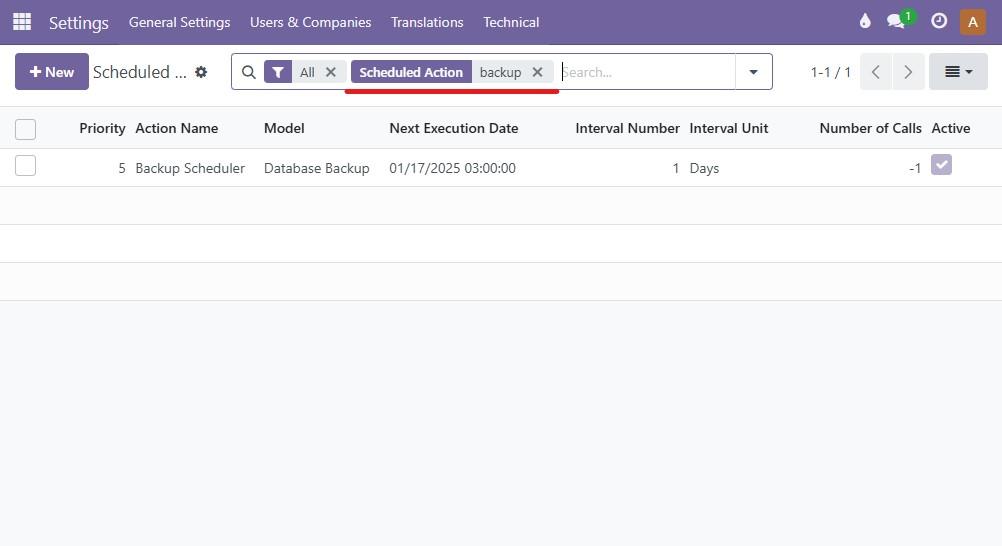
Go to Settings → Technical → Automation → Scheduled Actions
Search for the action named Backup scheduler.
Activate the scheduler and define how often you want backups to be generated (e.g., daily or weekly).
Screenshot:
Step 3: Connection to an External Server (Optional)
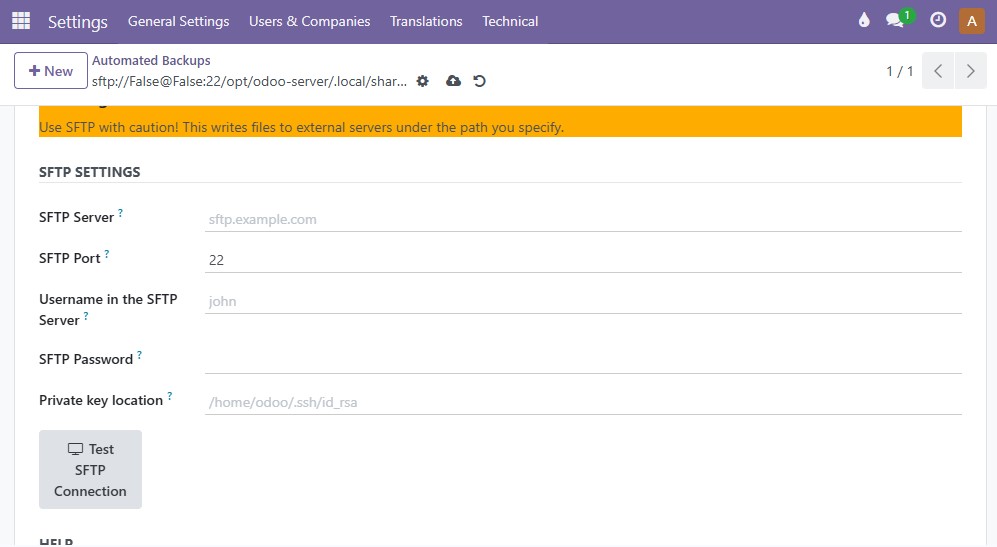
In the backup configuration, enter the external server credentials:
- Server address.
- SFTP port.
- Username and password.
- Path to store the backups.
Click the Test SFTP Connection button to verify that the credentials are correct.
- You will receive a confirmation message if the connection is successful.
- Adjust the credentials if necessary based on the error message instructions.
Screenshot:
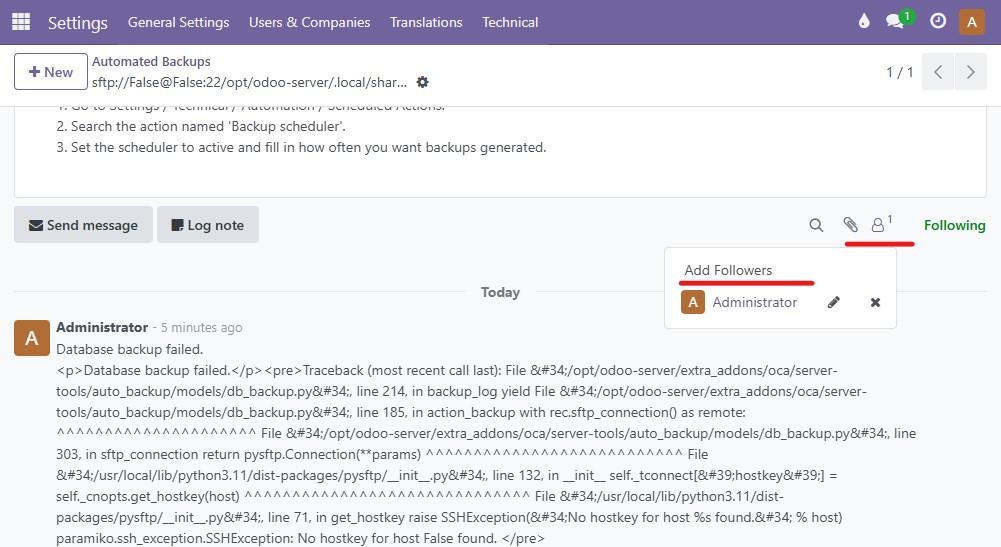
Step 4: Notification Configuration
Enable notifications to receive email alerts in case of backup failures.
- Subscribe to the corresponding notification type in the backup configuration.
Screenshot:
Step 6: Monitoring and Maintenance
Periodically review the backup reports to ensure everything is working correctly.
Set retention periods for:
- Local backups.
- Backups on external servers. This allows automatic deletion of old backups, optimizing storage usage.
Why choose auto_backup?
For clients with small database solutions, auto_backup provides a powerful and flexible alternative to keep your data protected. Ensure that your information is always safe and recoverable, regardless of the solution you choose.
Contact Us
Are you ready to activate the auto_backup addon or do you need help configuring it? Click below for more information or check our Our SLA
